Wednesday, December 16, 2009

Centennial Hat Photos

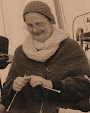
This shows the hat finished.


In this view, the hat is turned sideways and the tail is outstretched to better illustrate the decreases on the Ends and in the Middle.

Centennial Hat Instructions

One of the members of my Yahoo Group wanted to adapt a hat she saw in a Mini Series Centennial (from the late 1970's.) One of the characters wore this hat, and her friend wanted something like it.
http://www.youtube.com/watch?v=du5DW0nBHy4
Robert Conrad is wearing the hat... a dirty orange/red stocking type hat.

I created these generalized instructions for this hat, using Tunisian Simple stitch.

My hat is based on the average head size of 22 inches. I'm using Red Heart worsted weight yarn with a K sized hook. This is one size smaller than what I normally use with Worsted Weight yarn, but I wanted a stiffer fabric than normal... and yes, it is curling, but that will be conquered later. It took all of a 7 oz skein, and since it needed to be bigger, I’m going to suggest you have 8 oz of yarn on hand to finish this hat, if you use a K sized hook. The larger hooks won’t require as much yarn.

1. With your chosen Yarn and Hook, stitch a swatch to determine your Stitches Per Inch. A swatch is a piece of fabric worked in your chosen stitch, that is 4 inches square. Most experts recommend measuring from the middle of the swatch for a more accurate stitch count.

2. Measure the circumference of the head this hat will cover, and if you can get them to sit still long enough, measure from the bottom of the ear to the crown.

3. Multiply the number of ‘Stitches per Inch’ by the ‘Circumference of the Head’ measurement to determine the number of chains to begin with.

Row 1: Forward- Pick Up loops in ea ch. Return as you normally would.
Row 2: Forward- Tss in ea st, work last st. Return.
Repeat Row 2 until it is about half the length of the width, or the measurement from the bottom of the ear to the crown.

I’ve noticed that with most head measurements that the height of the head is a little less than half of the circumference of the head. If the head is 22 inches around, then stitch the fabric until it measure 11 inches.

IMPORTANT: Stitching the height of the body of the hat will look huge! But go ahead and stitch until it is half as tall as it is wide. For this 22" hat, it should have been 11 inches tall, not the 8" that I stitched. In my sample, the tail wasn’t long enough to reach the brim, and I had to make the brim much taller than normal.

If you do NOT want to stitch a Ribbing for the brim of the hat, continue stitching this section until it is 2-3 inches longer than ½ of the width. For my 22 inch hat, that would mean stitching the height of this section to 13-14 inches tall.

Once you have stitched the main body of the hat, you will begin decreasing on both ends AND in the middle to create the ‘stiff’ crease in the front and back. If you want a more relaxed looking hat, just decrease on the ends.

For Odd Numbered stitches- find the 5 stitches in the middle of the row, and mark them with a thread.
For Even Numbered stitches- find the 4 stitches in the middle of the row, and mark them with a thread.

For Odd Numbered stitches- Tss2tog, then Tss up to the marked stitches. Tss2Tog, Tss, Tss2tog, then Tss across the rest of the row, work last st. Return: Yo, pull through 2 loops (decrease made), then continue Return as you normally would.

Next Row: Tss2tog, then Tss up to the Center Stitches. Tss2Tog, Tss, Tss2tog, then Tss across the rest of the row, slip hk under both threads of the last st (Decrease St). Return: Yo, pull through 2 loops (decrease made), then continue Return as you normally would. Repeat this row to desired length for the top of the hat. Single Crochet in each stitch for the last row. End off.

Stitch back seam together, weave tails.

For Even Numbered stitches- Tss2tog, then Tss up to the marked stitches. Tss2Tog, Tfs (in between the stitches), Tss2tog, then Tss across the rest of the row, work last st. Return: Yo, pull through 2 loops (decrease made), then continue Return as you normally would.
Next Row: Tss2tog, then Tss up to the Center Stitches. Tss2Tog, Tss, Tss2tog, then Tss across the rest of the row, slip hk under both threads of the last st (Decrease St). Return: Yo, pull through 2 loops (decrease made), then continue Return as you normally would. Repeat this row to desired length for the top of the hat. Single Crochet in each stitch for the last row. End off.

Ribbing Section:
Turn the hat over and work from the back of the hat. Attach yarn to beginning chain of hat.
Pick up loops in ea ch st across row, Return as you normally would.
Rows 2+: Forward- (Tps, 2 Tks,) Repeat across row, working last st as you normally would. Return.
Repeat this until brim is desired height, then Single Crochet in each stitch for last row. End off.
Stitch back seam, and weave tails.

Wednesday, October 21, 2009

New Page at FaceBook!

Well, I am slow on the uptake with a lot of these technological things... but I've added a page for ChezCrochet.com at Facebook.

I would love to see photos of the things you've stitched from the patterns at ChezCrochet.com or from the pattern booklets I've written. And you can add them to the page at Face Book.

You can also become a Fan of ChezCrochet.com at Facebook and that link is at the bottom in the Right hand NavBar

Sunday, October 18, 2009

Selling Patterns Online

We've had some discussions on how to sell your stitching patterns online, instead of trying to sell them to a publishers.

I thought this would make a good post for this blog. These are a few things to consider when investigating hosting services that sell your patterns for you.

1. Make certain that you have all of your notes, and any previous attempts that were not so successful. This helps document your development process and that you did create this on your own. This is a copyright protection measure.

2. Investigate EVERY venue that you are considering selling your patterns through.
  • Identify their Seller and Buyer Protection policies
  • What are their Dispute Resolution Protocols
  • How good is the Search Engine
  • How easy or difficult it is to find your products in their system
It won't do you much good to list a product, if folks can't find it.

3. Weigh the Good and Bad of using a service that MEMBERS ONLY can purchase your products. Not everyone is willing or ready to JOIN a community, just to buy your pattern.

There is nothing more frustrating to a customer to Google an item; find exactly what they want, and then can't buy it right there.

You risk loosing numerous customers by forcing them to create a new account with a company that might use their information in ways the consumer doesn't want... or the hosting site offers no solid protection for that private information.

Saturday, September 5, 2009

Self Publishing- The Most Rewarding Slavery You'll Ever Know

I whine all the time that all I can do is work at home, because of my health issues. Then I sit down and realize ALLLL the 'jobs' I do to Run that business.

I am the Designer- I must have the imagination to envision a product.

I am the Author who must write instructions so that ANYONE can understand them.

I am a Stitching Editor who must make certain that the mechanics of the pattern are intuitive and not convoluted and too complicated.

I am the Editor who must read and re-read those instructions so that ANYONE could understand them, and that the instructions flow easily.

I am the Proof Reader who must make certain that the grammar & spelling are correct.

I am the Laborer who must follow the instructions, to generate samples of the pattern and/or test the written instructions.

I am the Photographer who must ascertain the best setup to highlight the features of the finished product and/or capture instructional photographs to better illustrate complicated or detailed instructions.

I am the Creative Director who must combine the Instructions and Photographs into visually pleasing format.

I am the Formatter (typesetter) who must translate the instructions of the Creative Director into a computer language that the Printer can understand.

I am the Printer (for my booklets, but the large book I contract out to a large printing service).

I am the Marketing Director who must determine the angles, themes, of how best to promote my products, and the best venues of where to ‘advertise’ my products.

I am the Advertising Director who must take the ‘thoughts’ of the Marketing Director and generate working advertisements for the products.

I am the Webmaster who must build and maintain the site, where the Advertising and Selling is done.

I am the Networking Specialist who must spend time in chat rooms, message boards, etc to increase interest in the Web Site where the products are advertised and sold.

I am the Shipping clerk.

I am the Bookkeeper.

I am the Inventory/Warehouse Director.

I am the Negotiator who secures the Best Price for the Best services in printers, delivery, or any other service.

I am the Office Manager who must answer correspondence, purchase supplies, pay the bills.

I am the Salesman who must talk to folks about the products and website to Sell the Products.

I am the Wholesale Accounts manager.

I am a Research Specialist who must compile information to help the Designer, Editors, Author, Marketing Director, Advertising Director, Webmaster, Teacher, and Business Owner.

I am a Teacher, so that I build my consumer base.

I am a Small Business Owner, and with all this work, it is much like being a Slave to My Business... and the most rewarding thing I’ve ever attempted.

Wednesday, July 22, 2009

Symbols for Tunisian Crochet- Not Practical

A member of the Yahoo group I co-own, recently asked about Symbols for Tunisian Crochet. So, I started compiling my answer to her... only to realize that it would make a great Blog Post.

I have seen some publications use symbols for Tunisian Crochet, but they tend to be based on the concept that there are only 3 or 4 stitches in TC. Those who have been in our group for a while, or have my book- know better.

When I was writing my first book, I realized that with Tunisian Crochet, there needed to be a 'distinction' for the concept of Stitches, since so many stitches could be created from a few basic mechanics. My decision was to label the 'basic stitches' as Foundations, since many stitches could be created from one 'beginning step,' the Foundation of the stitch.

I've found at least 6 Basic Foundations (Knit, Purl, Reverse, Simple, Full, and Reverse/Purl).
http://chezcrochet.com/page17.html

When you start twisting threads or pulling them to the opposite side of the fabric, you add even more individual Stitches, not just stitch combos. I labeled these stitches based on the Mechanics of creating them: the Front Purl, Back Simple, Twisted Simple and Twisted Purl stitches.

There are 2 Cross Bar Foundations- in which the hook is inserted into the Cross Bar/Horizontal Bar. http://chezcrochet.com/page23.html

Also, there are 2 Post Foundations which are worked just like classic crochet Post Stitches.

Now add to that, you can Extend each Foundation with a chain stitch, know as Extended Stitches. http://chezcrochet.com/page18.html

Also, each Foundation can be worked with Double and Treble Crochet mechanics.... ALL OF WHICH, CREATE A UNIQUE, INDIVIDUAL STITCH.
http://chezcrochet.com/page12.html
http://chezcrochet.com/page13.html

I did a quick count: there are 56 unique, individual Tunisian Crochet stitches...and probably several more, since I didn't include those mechanics I believe are so difficult that most folks would never try them. These are individual stitches, not stitch combinations.

The challenge becomes: How to create a Unique Symbol for 56 Different Stitches.

Theoretically, one could create a symbol for the Basic Foundations; plus, the Post and the Cross Bar Foundations, since these are the beginning step for all Tunisian Crochet stitches. That is a total of 10 symbols for the Foundations, alone.

From there one could add an extra symbol for all of the extra mechanics. This means that there would need to be an extra symbol for each of the following: Twisting a stitch, Backwards stitches, chain extensions, AND symbols for Dc and Trc mechanics.

Now, with all these extra symbols tacked on to the Basic Foundation Symbol, it will be difficult to ascertain, from stitch to stitch, what mechanics should be used for each stitch. In the printing, these symbols could run together so easily, that it would be a nightmare to interpret.

I'm not convinced that the needleworkers in their own homes would invest the time and effort to learn all these symbols. If I thought it could be done easily, I would have done it already.

I'm sure some enterprising soul could accomplish this, but I'm not convinced the average needleworker would use them. The parameters and additional mechanics are simply too large to invest the time learning symbols, instead of actually stitching.

Friday, July 17, 2009

ARNie's Resource Library for Tunisian Crochet

I'm posting this here, until I can get it up at my website: ChezCrochet.com
It would take me at least a week to type in ALL of the books in my resource library, but for Tunisian Crochet, this is the majorty of them.

*Materials used for Encyclopedia of Tunisian Crochet

Stitch Guides and Technical Manuals:

  • *"300 Crochet Stitches" London, England: Collins & Brown Ltd., 1998. (Originally published as The Harmony Guide to Crochet Stitches, Lyric Books, 1986.)
  • *"220 More Crochet Stitches" London, England: Collins & Brown Ltd., 1998. (Originally published as The Harmony Guide to 100's More Crochet Stitches, Lyric Books, 1992.)
  • *"Complete Guide to Needlework" Pleasantville, NY: Reader*s Digest Association, 1979.
  • *"Tricot Crochet: The Complete Book" Jones, Rebecca. Berkeley, California: Lacis Publications, 2000. (Originally published as "The Complete Book of Tricot." Australia: The Kangaroo Press Pty. Ltd., 1991)
  • *"Complete Stitch Directory" North, Patsy, ed. NY,NY: Crescent Books, 1982. (Originally published as *Millepunti,* Milan:Gruppo Editoriale Fabbri S.p.A., 1982.) My 'rosetta stone' for Tunisian Crochet, the book that launched my passion for this needlework.
  • "Creative Crochet Handbook" Palfy, Christa. Australia, Angus & Robertson Publishers, 1976.
  • "Lee Ward's Complete Library of Needlecraft" Houck, Carter, ed. Montgomery, AL, Fuller and Dees Publishing, 1985.
  • "A Treasury of Crochet Patterns" Blackwell, Liz. NY, NY, Charles Scribner's Sons, 1971
  • "The Encyclopedia of Knitting and Crochet Stitch Patterns" Mariano, Linda. NY, NY. Van Nostrand Reinhold Co, 1976.
  • "The New Crochet Dictionary" Goldberg, Rhoda Ochser. NY,NY. Crown Publishers, Inc. 1986.
  • "The Time-Life Book of Needlecraft" Donovan, Hedly, ed. NY, NY. Time-Life Books, 1976.
  • "McCall's Needlework Tresury" NY,NY. Random House/McCall's publishers, 1964.
  • "Good Housekeeping's Complete Book of Needlecraft" Guild, Vera P. Garden City, NY. Doubleday & Co, Inc. 1959.
  • "How To Crochet" Turner, Pauline, London, UK. Collins & Brown, 2001.
  • "Teach Yourself, Step by Step Guide: Tunisian Crochet" Nehring, Nancy. Little Rock, AK. Leisure Arts, 2004.
Carolyn Christmas' Easy Tunisian books:
  • "101 Easy Tunisian Crochet Stitches"
  • "Cable Hook Afghans"
  • "Sampler Afghan"
  • "Cable Hook Fashions"
Historical Reproductions
  • *"Knit, Net, Crochet, and More of the Era of the Hoop" Marsh, Heidi, ed.Davenport, Iowa: Amazon Drygoods, Ltd, 1993
  • "Needlecraft Practical Journal No. 61- New Crochet Stitches and Garments" The Manchester School of Embroidery, Augsta, ME, 1907 (Reproduction purchased from http://www.ivarose.com/)
  • "The Dictionary of Needlework" Caufield, Sophia Frances Anne & Saward, Blanche 1882; Reprint Edition- Arno Press, Inc. USA, 1972.
  • "The Complete Encyclopedia of Needlework" de Dillmont, Therese, 1886; Reprint Edition- Philadelphia, Pennsylvania, 1972.
  • *"Victorian Crochet" Weldon & Company, et. all. NY: Dover Publications, 1974. (A compilation of crochet patterns published by Weldon's Practical Crochet magazine published from 1875 through the 1930's.)

The number of Project Pattern books that I own is huge, so I will put those in another post later on.

Wednesday, July 1, 2009

Tunisian Crochet: The Look of Knitting With the Ease of Crochet

Most folks know that I have researched Tunisian Crochet for close to 20 years, both in modern and historical resources. I have lamented about the lack of information, and everyone has lamented about the lack of patterns available.

It is my great pleasure to tell you about a new book: Tunisian Crochet: The Look of Knitting with the Ease of Crochet, by Sharon Hernes Silverman. This 115 page large paperback is a welcomed addition to my own Tunisian Crochet Library, and I gladly recommend it.

Employing line drawings, detailed photographs, and step by step instructions, Ms. Silverman provides an excellent overview of the mechanics of Tunisian Crochet to help the beginner; plus new stitch combinations and project patterns that will thrill the experienced crocheter. The 16 patterns include a wide range of projects: home decor, things for babies, clothing for adults and children; she even includes a felted purse.

My particular favorites were the Sweet Baby Dreams Blanket- which combines Front Crossed Simple Stitches with Knit Stitches to create wonderful texture; and the Frosted Stitch Afghan, which uses ‘Shells and Columns’ or what the Victorian’s called The Double Gobelin Stitch.

I truly appreciated the ‘extras’ that Ms. Silverman included: schematics with every clothing project, several pages of body sizing and general measurements for patterns, and a yarn weights table.

The drawbacks in the book are minor: the adult clothing patterns go only to a size Large (No Plus Sizes); and some of the stitch names she uses are different. Most Tunisian Crochet enthusiasts won’t find this a major issue, because we are accustomed to different names for stitches, and she clearly defines the mechanics for all of the stitches she uses. An example: the Tunisian Full Stitch (worked between the stitches) is what she calls the Net Stitch.

Ms. Silverman states that Tunisian Crochet is "designed more for the experienced crocheter," and that is the only statement that I took exception with. From my own experience teaching both classic crochet and Tunisian Crochet, Tunisian Crochet is much easier to learn and master. When I have students who struggle with classic crochet, I can put a long hook in their hands and in two hours they are happily stitching. So, if you find this book in a bookstore near you, and you don’t know how to do Tunisian Crochet, don’t be afraid to try. This book can get you started and provide you with enough projects to get you 'hooked.'

Read more about the book at Sharon's Site:
http://www.sharonsilverman.com/books.htm

Tuesday, May 19, 2009

Instructions for the Scrap-A-Nator

For a short, quick, easy Tunisian Crochet ALong (at our Yahoo Group), I'm offering the instructions to stitch your own Scrap-A-Nator- a pattern designed to use up scraps... so that nothing goes to waste. An Ultimate Yarn Recycling pattern.

At least, 2 pounds of Scrap yarn
6.5mm up to 10mm hook (US size K up to N)
The K sized hook makes a denser fabric better suited for a Bath Mat or Rug.
The larger hooks make a more fluid fabric well suited for a lap throw.

Dimensions will vary:
Size K hook 24-26" wide, the length is determined by you.
10mm Hook 30-32" wide by 40-44" long

Special Instructions:
++RETURN: Yo, pull through 2 loops. (Yo, pull through Connecting Chain and 1 loop off hook) Repeat instructions inside ( ) until there is 1 loop on hook.
This type of Return will help to make a more solid Return edge. On the Forward of each row, you must work into the Hidden Stitch beside the last stitch, or this will decrease one stitch on the Return Edge.

HIDING TAILS ON THE RETURN:
Since this uses scraps, there will be numerous knots and tails to hide. I’ve had good results by stitching these into the fabric on the Return.
Return up to the Knot. Lay the Tails over the yarn, moving towards the Hook hand. Yo, pull through the stitches. Lay the tails over the yarn, moving towards the Yarn hand. Yo, pull through the stitches. Repeat this process, laying the tails- back and forth- over the yarn until they are too small. Later, you can use a smaller hook to pull the remaining tails into the Connecting Chain stitches to secures them.

The Scrap-A-Nator using ARNie’s Favorite Stitch

Holding 2 strands of worsted weight yarn together, chain 66-76.
Row 1: Pick up loops in ea chain, using the Camels’ Hump on the back of the chain stitch. Return, using the Special Instructions above ++.
Row 2: (Tss, Tps) across row, including Hidden St. Work last st, and Return using the Special Instructions.
Row 3: Tss, (Yo, sk 1 st, Tks in next st) Repeat across row, ending with Tks, Tss in Hidden St, & last st. Return using special instructions.
Row 4: Tss, (Tfs in Yo Sp, Yo, Sk Tks) Repeat across row, ending with Yo, sk Tfs, Tss in Hidden St, & last st. Return using special instructions.
Row 5: Tss, (Yo, Sk Tfs, Tfs in Yo Sp) Repeat across row, ending with Tfs, Tss in Hidden St,& last st. Return using special instructions.
Repeat Rows 4 & 5 to create pattern and work to desired length.
Last Row: Tss,(Tfs in Yo Sps, Tks in Stitches.) Tss in Hidden St, last st. Return using Special instructions.
Bind Off Row: Single Crochet in each stitch. End off and finish hiding tails.

For photos, look at posts from earlier this week.
Pattern Copyrighted by Angela 'ARNie' G. 2009.
For copyright permissions, click here:
http://chezcrochet.com/page9.html

Monday, May 11, 2009

UFO CAL


For the last few weeks, our yahoo group has been doing an informal Crochet Along, where we worked on our individual UnFinished Objects.

The shawl is one of my UFOs, and is Tunisian Crochet Feather and Fan. I'll be working more on the instructions, and hope to publish it later this year. This shawl was made with Homespun in various shades/ombres of Gray and Tan.

The colorful blanket is another Scrap-A-Nator, but is 3 feet by 4 feet, instead of just a lap throw.

The Scrap-A-Nator


In the process of choosing which project I could work on, I found the blue and lavender lapthrow that was half finished.... I was fighting migraines again, so that project would be easy to stitch.

I finished it in 2 or 3 hours... so I started another one. Finished it and started another one... I think I have 5 of them now, in just over a week. A larger version is in another blog post this week.

These are roughly 30 inches wide and 42 inches long, based on dimension my local needlework group uses for their charity lapthrows to local nursing homes. These throws are worked holding two strands of yarn together, using a 10mm hook, and MY favorite stitch. http://chezcrochet.com/page18.html

I will be doing a short TCAL (Tunisian Crochet Along) with our yahoo group starting May 18; using this pattern. I will provide tips and tricks, as well as, detailed instructions, yarn requirements, etc. http://groups.yahoo.com/group/tunisiancrochet/

The lap throw itself was an effort to use up a bunch of scraps and still have something visually appealing. Although I can't call this a Stash Buster, like the Stitch Diva's blanket, it does provide a great way of using up scraps.

Wednesday, January 21, 2009

Tess D'uberville Shawl- over view

There have been several interesting conversations about how to create a shawl seen in the BBC production of Tess of D'uberville.

That shawl was knitted, and since my knitting skills are rudementary at best... I never tried to knit it. I did look carefully at the photos and decided this could be done in TC, but put the project on the back burner.

Well, several days later someone asked this very same question: could this shawl be done in Tunisian Crochet... so I experimented with it and in only a few minutes had the answer.
First of all, the piece is a Mitered Corner Shawl in which the stitches run in the opposite direction of Mitered corner shawls that are more common place. It is this Stitch Direction that has caused all the commotion.

I could find no other way to duplicate this method, without first working a Square; then working the two Ends separately. Each end forms a Triangle that continues working rows of stitches from the square, but each row decreases along the top edge of the shawl.

Now, if you work all Tks, the stitch direction will look very similar to the more common triangle shawls. The opposite stitch directions will be more obvious with the Pronounced Ridges on the back of the piece.

You can work alternating rows of Tks/Tps (like in my sample), although with the Pronounced Ridge on back, you don't have to.

My instructions (in the next post) are written in such a way that you can insert any stitch you prefer, to create a shawl of your very own.

Check back here, or at my site: ChezCrochet.com for upcoming pattern booklets where I will offer variations on this shawl, with detailed stitching instructions.

These instructions and Schematics are Copyrighted by Angela 'ARNie' Grabowski 2009

Tess D'uberville Shawl

A. Ch 3.
Row 1: Forward- Yo, pick up a stitch, Yo, pick up last st. Return.
Row 2: Forward- Tfs- in Yo Sp, Yo, Tks, Yo, Tfs-in Yo Sp, last st. Return.
Row 3: Forward- 1 St. Yo, Tks, Yo, 1 St, last st. Return.
Row 4: Forward- Work chosen stitches up side, Tfs-in Yo Sp, Tks, Tfs-in Yo Sp, then work chosen stitches down the other side. Return.

Repeat Row 4 to create length.

B. These instructions create a Mitered corner square, as seen by the white lines.

C1. Once the Diagonal measurement of the square equals the length of the shawl (from your neck down). Stitch Up this side up to the 1st Yo Sp. Return.
Subsequent Rows: Stitch up side to last 3 sts. Tss2tog, last st. Return.

C2. When you have only 1 loop remaining- DO NOT END OFF. Remove the hook and put a Work In Progress (WIP) Clip into the loop. This can be a paper clip, pinch style clothes pin, a file clip (bull dog clip.)

D. Attach a new ball of yarn into the empty Yo Sp.
Stitch down this side and Return.
Next Row: Stitch normally- following your chosen stitch pattern. Return as you normally would until you have 2 stitches left (3 loops.) Yo, pull through all 3 loops (Decrease made- Dec).
Subsequent Rows: Ignore the Stitches within the Dec. Stitch down side. Return following instructions in previous row.
When there is only 1 loop left, End off.

E. Go back to other End, and removed Wip Clip. Insert hook and work classic crochet Single Crochet stitches or Slip Stitches across the top edge of the shawl.

Friday, January 9, 2009

Peaches & Creme Yarn in Tunisian Crochet


A member of my Yahoo group and Ravelry was asking about TC with Peaches and Creme... a worsted/aran weight cotton yarn.

This is one project I used TC with a lacy open stitch Arrowhead Netting.
The pattern for this blanket is in the booklet: Arrowhead Netting, that includes instructions for one method for creating Round objects.
You can order the book here:
You can see Arrowhead Netting instructions here:

Thursday, January 8, 2009

TCAL Inspiration

I will be doing a Tunisian Crochet A-Long (TCAL) through my Yahoo group starting January 18, 2009.
This is the inspiration for the upcoming piece.
It is a Knitted Sweater pattern produced by the Reynolds Yarn Co, Townsend, Massachuesetts, 2004. The title of the pattern is Rapture #82287.
Now, my piece will be done in Tunisian Crochet, and will look much different, since I will be using different stitch combinations and adding some cables to the design....
However, this is my inspiration for the TCAL.
The TCAL will be designed so that you can create a piece to fit your needs, using yarn from your stash.
I will be creating a piece that will eventually become the back for a sweater coat similar to this sweater.